Our blog

All About Fire Sand Buckets

By MSF MSF in 
Sand Bucket

A fire bucket is a bucket filled with water or sand which is used to prevent or extinguish fires.

Typically, fire buckets are painted bright red and have the word fire stencilled on them. Often they have a convex, protruding bottom. The rounded bottom results in a strong, directed stream of water when the water is thrown at the fire. The rounded-bottom bucket is far more efficient in launching the water at the fire than a flat bottom bucket.

Fire buckets are a low-technology method of fighting small fires. Although largely superseded by more modern forms of firefighting equipment, they retain some distinct advantages and remain the preferred method for fighting small fires in certain situations. The main advantages of fire buckets are that they are cheap, reliable, easy to use and can be quickly refilled and reinstated.

Normally, they are hung on dedicated fire bucket stands and placed in prominent positions in rooms or corridors, next to ovens or barbecues, and in government accommodation such as army barrack blocks. They are also commonly found in hyperbaric chambers.

Oil fires are resistant to water, but small fires can be effectively extinguished when the sand in the bucket is dumped on the fire to starve it of the oxygen it needs to stay alight. This method of fighting liquid fires has generally been replaced by modern foaming agents.

The sand from a fire bucket can also be used to absorb spills of flammable liquids and render them less dangerous, by reducing the risk of ignition and explosion. Fire buckets are often provided at petrol filling stations to absorb any small fuel spills.

What You Need to Know About Smoke Alarms

By MSF MSF in 

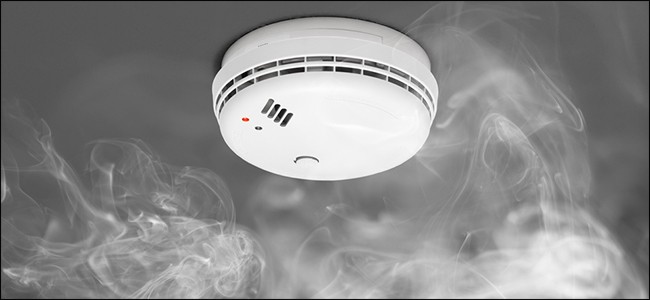
Smoke alarms are very affordable and pretty basic, but they can definitely be life savers. However, there might be some things you don’t know about smoke alarms that could make you rethink the ones you have now.

Smoke Alarms vs. Smoke Detectors

Before we dive deep into discussing smoke alarms, it’s important to talk about the differences between smoke alarms and smoke detectors. These two terms are colloquially interchanged, but they’re actually different types of devices.

The big difference is that “Smoke alarms” are all-in-one self-contained units that include the smoke sensor and the audible alarm. This is likely what you have in your house or apartment.

“Smoke detectors” usually only contain the smoke sensor and nothing else. From there, the alarm is a separate unit and the controls for the whole system are kept in a central location. You’ll find these types of systems in commercial applications, like in hotels and hospitals.

So basically, smoke alarms are what you would find in most residences, whereas smoke detectors are usually found in places of business. In this article, though, we’ll be focusing mainly on residential smoke alarms.

There Are Two Different Types of Smoke Sensors

Unfortunately, not all smoke alarms are created equal. This is because two different types of sensors exist for detecting fire and smoke. Those two sensors are called “photoelectric” and “ionization” sensors, and they both sense vastly different types of smoke and fire.

In a nutshell, photoelectric sensors are good at sensing smoldering fires, which are slow-burning fires that don’t produce much of a flame. Ionization fires are great at detecting the opposite—fast-burning fires that produce a lot of flames. Both sensors use different sensing technologies, thus the reason for detecting different types of fires.

You can absolutely find smoke alarms that offer both types of sensors in one device, but it’s also pretty easy to find smoke alarms that only offer one or the other. If it wasn’t obvious, it’s recommended to buy a smoke alarm that comes with both types of sensors, like this model from First Alert.

If you’re interested in a smart smoke alarm like the Nest Protect, it technically only includes a photoelectric sensor. However, it’s noted that the sensor is “split-spectrum”, which basically just means that it’s highly sensitive to both types of fires.

Battery-Operated vs. Wired Smoke Alarms

On top of the different types of sensors, smoke alarms also come in two different types of power connectivity: battery-operated or hardwired into your home’s electrical system.

Hardwired smoke alarms are arguably the best because not only do you not need to worry about changing the batteries, they’re also interconnected. This means that if one alarm goes off, then all of the other alarms go too, which is great if you have a larger house and there’s the possibility of not being able to hear one alarm go off from across the house.

Not all houses are wired for smoke alarms, though, which is where battery-operated units come into play. They’re also easier to install, since there are no wires to deal with.

In any case, it’s important to know which type your house uses so that you don’t buy the wrong one when it comes time to replace them, which brings us to our next point..

Smoke Alarms Eventually Expire

Just like that milk sitting in your fridge, smoke alarms go bad after a while.

The National Fire Protection Association recommends that you replace your smoke alarms every ten years. This is because the sensors eventually degrade in quality to the point where they’re no longer effective.

Yes, that even includes your more expensive smart smoke alarms. On top of the recommendation for replacing smoke alarms, Nest says that most CO detectors need to be replaced every 5-7 years, and since the Nest Protect has a CO detector, you can plan on replacing the entire unit that often.

Where You Need to Install Smoke Alarms

It’s likely that when you first equipped your home with smoke alarms, you just chose a couple spots around the house that seemed like good places to install them. However, you probably need more smoke alarms than you think.

You need to install smoke alarms inside every bedroom, outside every sleeping area (like a hallway that connects a bunch of rooms together), and on every level of the home, including the basement.

It’s also important that you install them no farther than 12 inches from the ceiling if you’re installing them on a wall (since smoke rises), as well as not installing them near doors, windows, or vents where drafts and general airflow could interfere with the smoke alarm’s detection abilities.

Install a Fire Alarm Bell in 6 Easy Steps

By MSF MSF in 
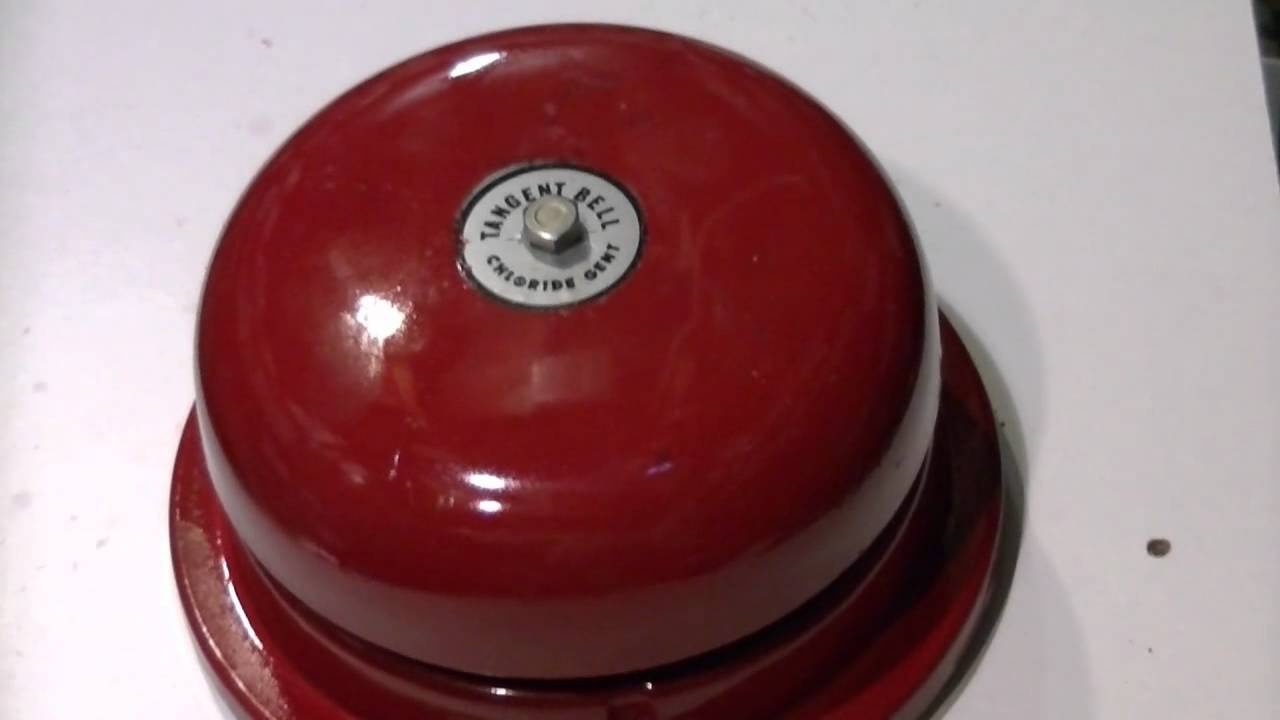
Fire bell

All kinds of issues can lead to the activation of a fire alarm bell—rising smoke, ambient heat, and even water flow through the fire alarm system—but all bells ring to encourage safe and early evacuation by a building’s occupants, and proper placement is key. In this article, MS FireSystems shows you how to safely install a fire alarm bell in six easy steps.

Looking to shop for a new fire alarm bell instead? Click here to browse our selection of fire alarm bells and accessories.

Mount your fire alarm bell in six steps

Fire alarm bells are available in a range of brands, sizes, noise levels, and voltages. As such, these instructions may be slightly different for your bell. In this guide, we’ll show how this process works with one of our own 8-inch, 120 volt AC fire alarm bells. The bell we’re using features a mechanism with a simple 4-wire design sized for standard 2-gang electrical openings.

As with other electrical work, improper installation can damage equipment or harm the installer. Only qualified electricians should install a fire alarm bell.

If you’re ready to start mounting a fire alarm bell, you’ll need three things: a fire alarm bell, a Phillips-head screwdriver, and an adjustable wrench.

Step 1: Mount at the right height

Choose a mounting height for your fire alarm bell based on your manufacturer’s guidelines and ceiling height. Various installation guides recommend a mounting height of at least 8 feet (or 2.4 meters) from the floor and as close to the ceiling as possible.

Step 2: Remove the gong

Next, remove the red bowl, or gong, surrounding the inner parts of a fire alarm bell. Most bells have a short hex bolt or Phillips screw on the front of the bell near the gong’s center. Loosen the bolt and gently remove the gong.

Removing the bolt allows the fire alarm bell mechanism to be exposed.

Step 3: Wire the fire alarm bell

Next, shut off the power supply to the bell’s power source. Circuit breaker switches should be secured with appropriate lockout/tagout devices to stop other people from accidentally reenergizing the wires you’ll be working with.

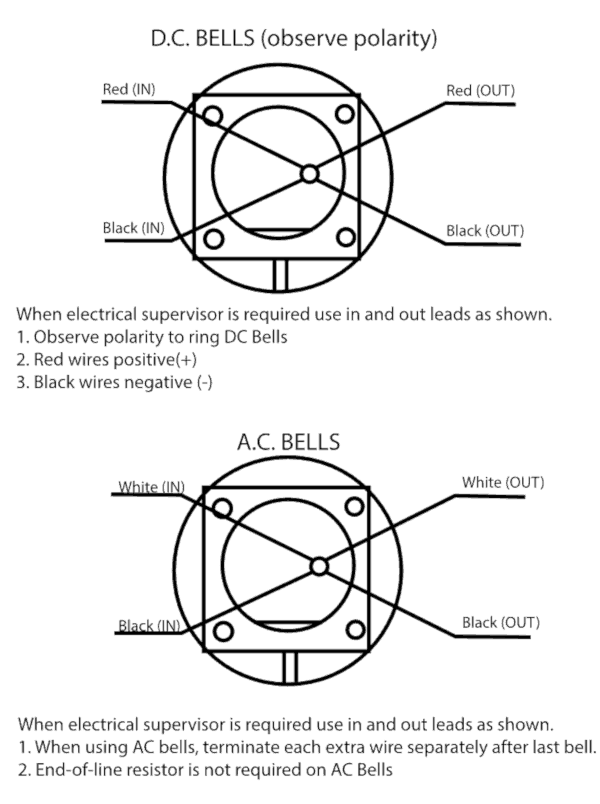
Then, connect the wires in the fire alarm bell to the wires in the wall. These instructions will vary with the type of current used by the bell: alternating current (AC) fire alarm bells have different wiring schemes than direct current (DC) bells. This handy wiring guide is a suitable starting point for many 4-wire AC and DC alarm bells.

AC and DC fire alarm bells can both connect to fire alarm systems and other devices with only four wires.

Step 4: Mount the bell to the outlet box or back box

Mount your bell to a standard square outlet box or, better, a fire alarm bell back box. Unlike standard outlet boxes, back boxes protect your alarm bell’s wiring from dirt, dust, and debris. Wind and rain will quickly short the bell’s wiring if it isn’t properly protected, which makes back boxes especially critical if you’re mounting your alarm bell outside.

To install a fire alarm bell a back box, simply fasten the included bolts in the holes that align the bell’s housing unit with the back box. The back box’s gasket will form an air and water-tight seal.

Back box installation with a Phillips screwdriver.

Step 5: Reattach the gong

Reinstall the gong. There are two holes on the gong itself – make sure they align with the positioning pins on the bell’s housing unit and re-tighten the bolt you removed in Step 2.

Align the positioning pins to ensure proper installation.

Step 6: Test the bell

Finally, test the bells to ensure that they are correctly wired and sufficiently loud. Each bell must be audible in all areas.

Wondering where to mount an external alarm bell for your sprinkler system – or if you even need one? Check out this blog.

Fire alarm bells at MS Fire Systems

MS Fire Systems carries a complete line of 120-volt and 24-volt alarm bells in 6-inch, 8-inch, and 10-inch sizes. Each bell is covered in a thick fire-engine-red enamel to prevent corrosion and resist weathering.

With a 10-inch gong, these fire alarm bells are large enough for use in commercial and residential applications.

Weather-proof, wire-protecting back boxes and durable gong-protecting wire guards are available for each fire alarm we sell.

Need more guidance on fire alarm bell mounting? Comment here, call us at +260 21 1244581 , or email us at sales@msfiresystems.com

Like what you’ve read? Check us out at Facebook or on LinkedIn.